As an Amazon Associate, we earn from qualifying purchases. Some links on this site are affiliate links at no extra cost to you. Our recommendations are based on thorough research and editorial judgment.

How to Layer Multiple Shade Sails for Effect
Layer multiple shade sails using complementary shapes like triangles and rectangles, ensuring overlapping or spaced arrangements for airflow. Position sails between 2 to 3 meters high with 30 to 40-degree angles for efficient rainwater drainage. Secure points with stainless steel hardware and corrosion-resistant fittings, adjusting tension with turnbuckles to prevent sagging. Align installation based on sun path analysis to maximize shade and ventilation. Prioritize resilient fabric choices and tension monitoring. Explore advanced layering techniques and maintenance for ideal results.
Key Takeaways
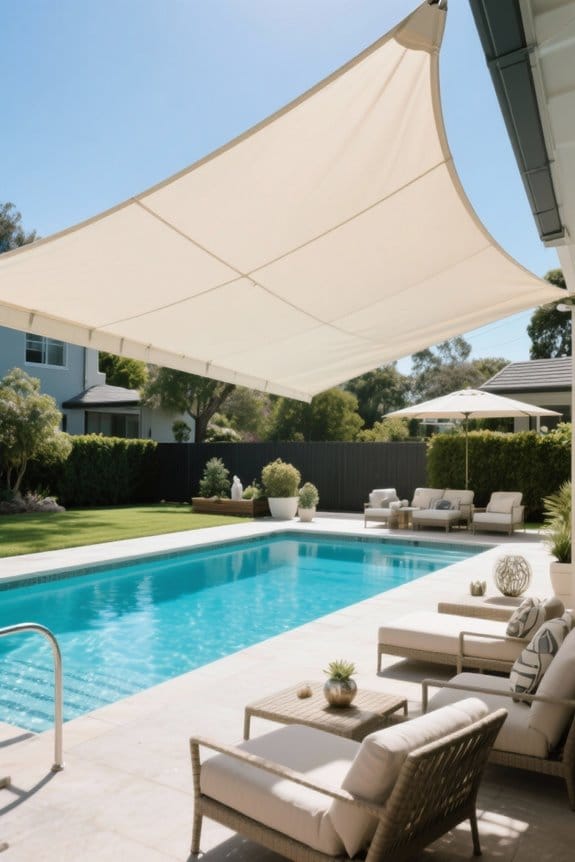
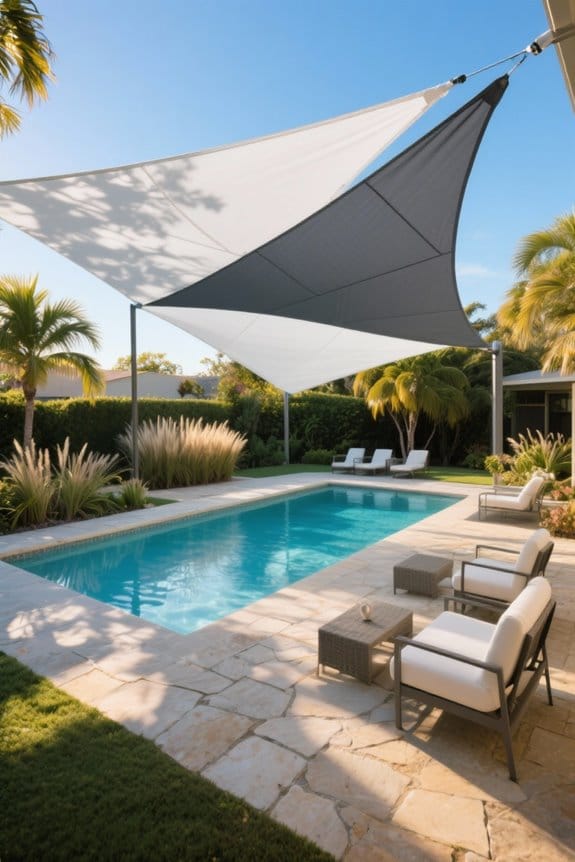
- Overlap sails with varied shapes and colors to increase shade coverage and create visually appealing geometric patterns.
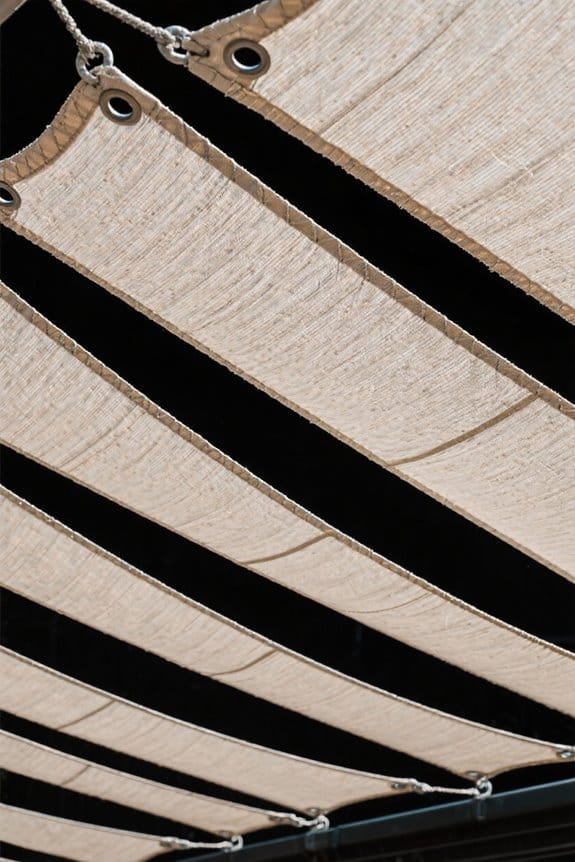
- Space sails to improve ventilation and prevent heat buildup beneath layers.
- Vary sail heights by 1 to 2 feet and set angles between 30°-40° for proper rainwater runoff and dynamic visual appeal.
- Use UV-blocking fabric and corrosion-resistant hardware for durability and vibrant color retention.
- Combine fixed and retractable sails with secure, tensioned anchor points to maintain stability and allow adaptable shade coverage.
Benefits of Layering Shade Sails
You may be interested

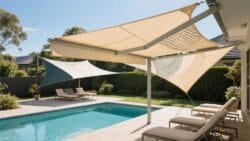
Although it requires precise planning, layering shade sails delivers multiple benefits that justify the effort. Enhance your outdoor space by overlapping sails of various shapes and sizes to improve shade coverage, especially in irregular layouts. Focus on maximizing ventilation by spacing sails to allow airflow, reducing heat buildup beneath. Utilize different colors strategically to add visual appeal and create geometric patterns that enliven the environment. This technique cooler shaded areas, which helps lower indoor temperatures during hot months. Aim for flexible configurations to adapt seasonal shading needs or special events. Always measure sail dimensions accurately, verify hardware strength, and guarantee tensioning systems withstand wind loads. Address overlapping points carefully to prevent water pooling and maintain structural integrity. Embrace layering to transform functional shade into dynamic, comfortable outdoor spaces. For optimal durability, ensure the shade sails are made from UV-stabilized materials with reinforced edges and grommets to withstand weather exposure.
Selecting Compatible Shapes for Layered Sails
Begin by evaluating available space dimensions and sun exposure patterns before selecting shade sail shapes. Choose triangular sails for overlapping coverage in smaller areas, as they blend aesthetics with function. Use rectangular sails when working with larger outdoor spaces to maximize shade without hindering airflow. Combine different sizes and heights to create layered sails that accommodate varying sun angles throughout the day, adding visual intrigue to the setup. Arrange sails with slight tilts to guarantee proper rainwater runoff, preventing pooling that deteriorates fabric and tensioning components. Measure twice for proper mounting point placement, using turnbuckles and pad eyes rated for at least 200 pounds to maintain sail tension. Account for wind direction and surrounding obstacles, adjusting sail shapes accordingly to avoid flapping and wear. This strategic shape selection optimizes durability and shade coverage effectively. Additionally, regular maintenance like rinsing and inspecting parts can prolong the lifespan of fabric installations similar to recommendations for maintenance of Aquabot robotic pool cleaners.
Recommended Products

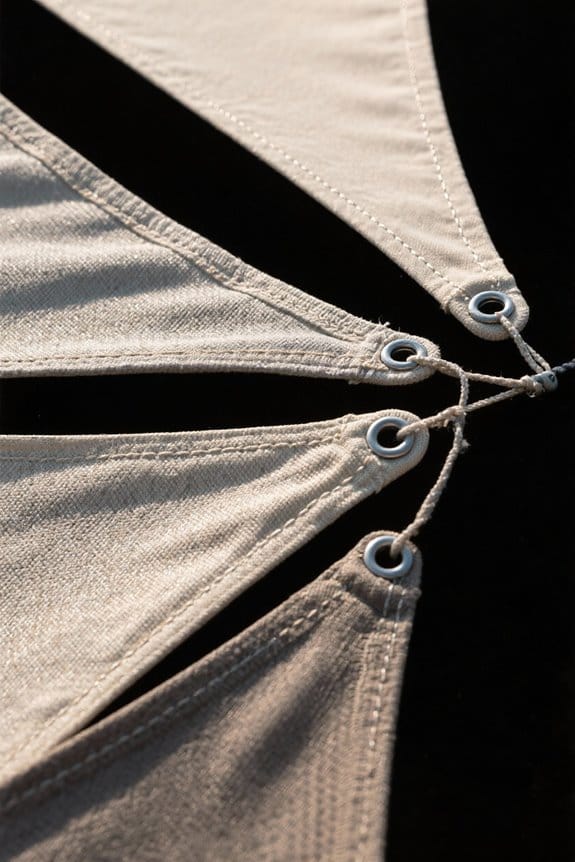
Super Heavy Duty Commercial Grade Design: Crafted from 280 GSM permeable extra heavy-duty fabric and reinforced with stainless steel mounting rings, KANAGAWA patented design integrates cable wires into the edges. This ensures all pulling strength is directed to the cable wires, enhancing both durability and appearance, making it ideal for commercial and residential use

Super Heavy-Duty Commercial Grade Design: Crafted from 280GSM extra-heavy-duty permeable fabric and reinforced with stainless steel mounting rings. The patented Artpuch design integrates steel cables into the edges, directing all pulling tension to the cables—enhancing both durability and appearance for commercial and residential use.

Reinforced Cable-Edge Design - Built for maximum durability, our sunshade features a full-perimeter cable wire system (not just at the corners), ensuring even tension, long-term shape retention, and superior edge strength
Choosing Colors to Enhance Visual Impact

Select a balanced color palette by combining bold and neutral tones to create layered shade sails with strong visual impact. Choose bold colors as focal points and neutral shades to provide subtle contrast, enhancing the overall shade sail design. Incorporate contrasting colors that complement each other to increase visual interest and depth, making the outdoor space feel inviting. Use a gradient effect with smoothly shifting colors to add sophistication and emphasize the interplay of light and shadow across sails. Alternatively, try layering different tones of the same color for a cohesive, monochromatic scheme that enhances depth without overwhelming the eye. Select fabrics with UV-blocking properties, ensuring comfort and durability while maintaining vibrant color quality that will consistently enhance outdoor shade effectiveness. Considering high-density polyethylene (HDPE) fabric is advantageous since it blocks up to 95% of UV rays while promoting breathability.
Recommended Products

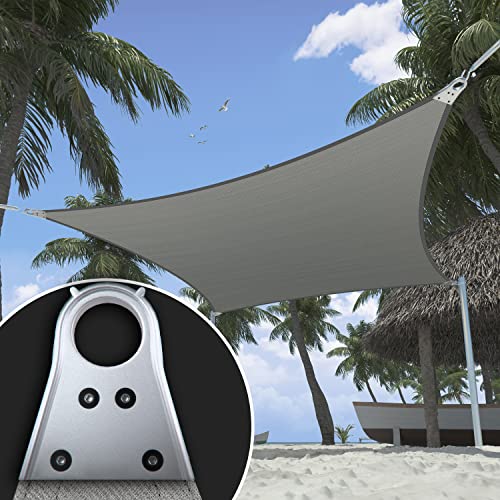
Heavy Duty: our super ring shade sail exact 260 GSM permeable extra fabric, stainless mounting super rings, edges with cable wires built-in, integrate into the mounting rings, all pulling strength goes to the cable wires, making the edges more durable

𝗖𝗢𝗟𝗢𝗥 & 𝗦𝗜𝗭𝗘: Classic Series Features a Gray Frame, Fabric Color: Canvas Umber (solid), Size: 13' Wide x 10' Projection Full Extension. Advaning Awnings are 100% Fully Pre-Assembled and Ready for Installation.

Durable Heavy-Duty Material: Crafted from 260 GSM high-density polyethylene, this sunshade is fade-resistant, deformation-proof, and stretch-resistant
Planning Heights and Angles for Optimal Coverage
When planning the heights and angles of layered shade sails, vary each sail’s elevation by at least 1 to 2 feet to enhance visual interest and facilitate water drainage. Set the highest sails at a maximum height of 3 meters to comply with building regulations and maintain structural integrity. Install top layers at steeper angles—approximately 30 to 40 degrees—to channel rain away from lower sails, preventing water pooling and extending fabric lifespan. Adjust the angles and orientations of overlapping sails to maximize UV protection throughout the day, positioning each layer to block different sun angles effectively. Use contrasting shapes and colors to boost aesthetic appeal, ensuring lower sails provide consistent shaded zones. Carefully measure and mark mounting points before installation for precision in aligning heights and angles according to these guidelines. Additionally, using adjustable turnbuckles in the installation hardware allows for tension adjustments, which helps maintain tautness and stability in layered shade sail setups.
Recommended Products

SPECS - (60) Jaw and Jaw Turnbuckle | Diameter: 3/8" (A) | Body Length: 6" (BB) | Length Closed: 11.38" (N) | Length Open: 17.75" (M) | Jaw Opening: 0.53" | Pin Size: 0.31" | Working Load Limit: 1,200 lbs | Design Factor: 5:1 | Weight: 0.9 lbs each

✅[HIGH QUALITY]: Made of heavy duty polyethylene with 95% solar protection. Rugged, tear and abrasion resistant.Give you your own cool place in the sun!

PACKAGE INCLUDED - Supporting wire cable, duplex wire clips, turnbuckle, pad eyes, screws, shade panels, control tape, retract rod, installation manual. If you miss any parts, please feel free to contact us.
Assessing Sun Path and Shadow Movement
Consider the sun’s trajectory throughout the day and across seasons to position shade sails effectively. Conduct thorough shadow analysis using solar path charts or digital tools to map sun exposure and anticipate shadow movements. Identify peak sun hours when shade is most needed, then arrange the shade structure’s layers to guarantee maximum coverage without gaps. Account for the angle of sunlight to overlap sails correctly, avoiding areas where shadows may lapse. Incorporate slight tilts for rainwater drainage while maintaining direct sun block. Confirm each sail’s placement supports efficient air circulation, preventing heat buildup beneath multiple layers. Regularly revisit shadow studies after installation to verify continuous coverage during critical periods, adjusting tension or height as needed to maintain performance and comfort. For powering outdoor equipment like shade sails with integrated lighting or fans, ensuring the proper electrical requirements is essential for safety and functionality.
Fabric Options for Layered Shade Sails
Fabric choice fundamentally influences both performance and longevity in layered shade sail installations. Select high-quality fabrics such as Mehler PVC for durability and 100% UV rays protection, or knitted HDPE for breathability and up to 95% UV blockout. Specify each shade material according to site conditions; for example, SMonotec fabric suits windy areas with its 15-year warranty. Prioritize fabric colors to manage heat and aesthetics: light tones reflect sunlight, while darker ones absorb UV rays, enhancing complementary outdoor designs. Opt for custom shade sail orders to combine contrasting textures and colors, generating dynamic visual effects. Verify that the chosen fabrics allow airflow, prevent heat buildup, and maintain structural integrity. Carefully layer fabrics to guarantee compatibility, balancing water shedding capabilities without compromising sun protection or the intended shade effect. Regular maintenance routines, including inspection of stitched seams and hardware, will ensure prolonged durability and performance of layered shade sails.
Recommended Products
Heavy Duty: our super ring shade sail exact 260 GSM permeable extra fabric, stainless mounting super rings, edges with cable wires built-in, integrate into the mounting rings, all pulling strength goes to the cable wires, making the edges more durable
Heavy Duty: our super ring shade sail exact 260 GSM permeable extra fabric, stainless mounting super rings, edges with cable wires built-in, integrate into the mounting rings, all pulling strength goes to the cable wires, making the edges more durable
Heavy Duty: our super ring shade sail exact 260 GSM permeable extra fabric, stainless mounting super rings, edges with cable wires built-in, integrate into the mounting rings, all pulling strength goes to the cable wires, making the edges more durable
Ensuring Proper Tension and Drainage
Tighten each sail to a minimum of 30% tension, ensuring fabric stays taut and prevents sagging that traps water. Use high and low fixing points to establish a slope with a minimum drop of 1:25, promoting efficient drainage. Check all fixing points for security, preferring stainless steel fittings to resist corrosion and maintain durability. Position each layer at a slight angle, directing water runoff away from seating or walkways. In heavy rainfall zones, install drainage channels or spouts at sail edges to prevent pooling beneath. Regularly inspect tension and fixtures, retightening or replacing parts as needed to avoid fabric fatigue and water damage. Proper tension and drainage extend the lifespan of layered shade sails while maintaining effective shelter and structural integrity. Additionally, using corrosion-resistant materials such as stainless steel can significantly enhance the durability and safety of outdoor installations.
Designing for Wind and Weather Resistance
Although layering shade sails provides effective sun protection, designing for wind and weather resistance requires careful planning. Position sails at varying heights using alternate high and low fixing points to distribute tension evenly and minimize flapping. Select high-performance fabrics like SMonotec to enhance wind resistance and durability under severe conditions. Create narrow airflow channels by spacing sails strategically, allowing wind to pass through and reducing stress on anchors. Employ stainless steel tensioning systems, checking anchor integrity regularly, especially after storms. Incorporate angles that shed wind efficiently, improving stability. Use a creative shade sail arrangement that balances reducing heat with maintaining structural resilience. Inspect and adjust tension frequently to prevent sagging or excessive strain. These steps guarantee layered sails withstand harsh weather while providing effective shade without premature wear or damage. Regular seasonal inspections are necessary to maintain sail performance and longevity.
Combining Fixed and Retractable Shade Options
Extend shade sail versatility by combining fixed and retractable systems in your outdoor design. Begin by installing fixed shade sails to establish strong, durable anchor points that support structural integrity. Add retractable sails like the Shaderunner Retractable Sail system, which uses stainless steel wires and pulleys for smooth operation. Adjust retractable sails daily to optimize customizable shade coverage, responding to shifting sun angles and seasonal changes. Layer shade sails with overlapping corners, selecting contrasting textures or colors to produce a visually dynamic setup that maximizes UV protection. Facilitate proper tension in both fixed and retractable sails to prevent sagging and reduce wind stress. Regularly inspect hardware and fabric for wear, lubricate pulleys, and test retraction to maintain ease of use. Combining fixed and retractable options enables flexible, efficient shading year-round with controlled sunlight exposure. Additionally, choosing materials with good stability in high temperatures ensures lasting shade performance even on hot, sunny days.
Recommended Products
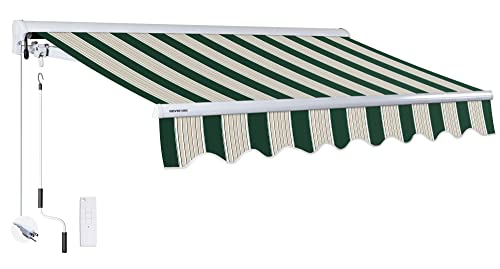
𝗖𝗢𝗟𝗢𝗥 & 𝗦𝗜𝗭𝗘: Luxury Series Features a White Frame, Fabric Color: Garden Green with Sand Beige Stripes, Size: 14' Wide x 10' Projection Full Extension. Advaning Awnings are 100% Fully Pre-Assembled and Ready for Installation.

Fully Pre-Assembled and Ready for Installation: Our Retractable Awnings are Shipped Fully Assembled and Ready for Installation. All you need is to install the brackets, fix the awning torsion bar to the wall, attach the crank handle and then it's done!

High-Quality Materials: The retractable awnings for patio is made of high-quality waterproof and UV-resistant fabric, ensuring it does not fade or deform over time.
Integrating Shade Sails With Existing Structures
Ensuring secure and properly positioned anchor points on existing structures is essential when integrating shade sails, as these must withstand significant tensile force and wind loads. Start by evaluating structural strength, selecting durable fixing points on pergolas, beams, or posts. When installing multiple shade sails, alternate high and low fixings to create dynamic layers that improve water runoff and visual interest. Combine shade sails with existing outdoor furniture or built elements to enhance aesthetics and maximize UV protection. Use stainless steel tensioners and heavy-duty turnbuckles to maintain proper tension across each sail, and check connections regularly for wear or slack. Plan sail shapes and colors carefully, ensuring harmony with surrounding architecture. Following these steps results in a stable, attractive shade solution that complements existing outdoor features effectively. Additionally, choosing high-density polyethylene fabric can significantly enhance durability, UV protection, and overall longevity of your shade sail installation.
Prioritizing Safe and Secure Anchor Points
When installing layered shade sails, select anchor points made from robust materials such as thick-walled steel poles to assure durability under high wind loads. Ascertain footings exceed the frost line, ideally deeper than 24 inches, to resist lateral forces and maintain structural integrity. Alternate high and low fixing points to distribute tension evenly across layers, preventing sagging and extending durability. Use proper tensioning hardware to achieve consistent tension without overstressing anchor points. Always verify compliance with local building codes for height limits and structural requirements. Finally, inspect anchor points regularly for signs of wear or instability—replace or reinforce as needed to uphold safety. Prioritizing secure anchor points is essential to a reliable, long-lasting layered shade sail system.
Maintenance Tips for Layered Shade Sail Installations
Regularly assess the tension of each layered shade sail, using a calibrated tension meter if available. Prevent sagging by adjusting tension levels, which will maintain shade effectiveness and prolong fabric life. Clean sails monthly with mild soap and water, remove embedded dirt and debris to preserve UV protection and fabric strength. Confirm each custom sail has a slight slope, usually 10-15 degrees, to facilitate rainwater drainage and avoid pooling. Inspect anchor points and fittings on the deck every three months for corrosion or wear, especially in coastal environments. Secure or take down the sails during extreme weather, such as winds exceeding 60 mph, to prevent damage. Document maintenance activities and address issues promptly to guarantee long-term performance and safety throughout the layered sail installation.
Frequently Asked Questions
How to Layer Sunshades?
Like weaving a colorful tapestry, layering sunshades involves selecting different fabric options, applying ideal installation techniques, embracing aesthetic design choices, and considering potential lighting effects to create harmonious, functional, and visually engaging outdoor spaces.
Can You Connect Two Shade Sails Together?
Shade sail connections can be secured using proper installation techniques and durable hardware. Attention to fabric compatibility and tension guarantees structural integrity and maximizes aesthetic appeal, creating a cohesive, visually pleasing arrangement for effective sun protection.
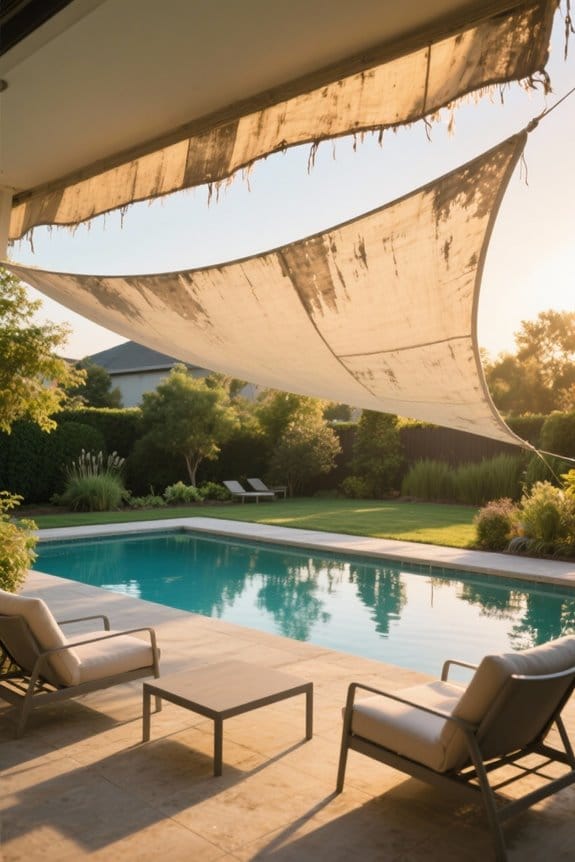
What Is the Disadvantage of a Shade Sail?
Shade sails, like fragile leaves in a storm, symbolize inadequate protection against heavy rain and wind. Installation difficulties and aesthetic limitations mirror tangled branches, while maintenance concerns reflect the cyclical demands of nature’s upkeep, revealing their inherent vulnerability.
How to Join Two Pieces of Shade Cloth?
Joining two pieces of shade cloth materials involves overlapping edges by at least 2 inches and using high-strength sewing with UV-resistant thread or fabric tape. These joining techniques guarantee durability for various shade fabric types in outdoor applications.