As an Amazon Associate, we earn from qualifying purchases. Some links on this site are affiliate links at no extra cost to you. Our recommendations are based on thorough research and editorial judgment.

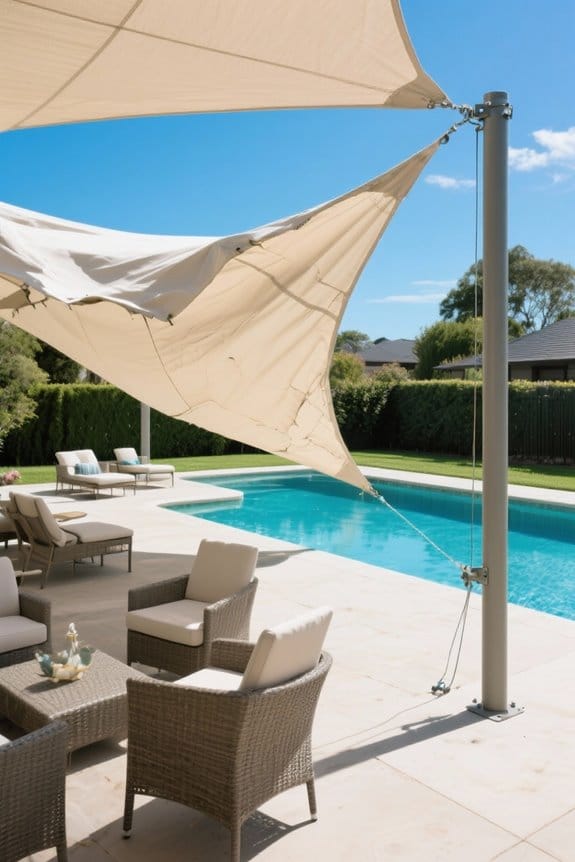
Top Mistakes When Installing Shade Sails

Measure the outdoor area precisely using a steel tape, accounting for multiple points and adding 0.5–2 feet for hardware. Select posts at least 90mm in diameter, bury them one-third underground with concrete for stability. Mount the sail at a 20–30 degree angle to guarantee rain runoff, stretch fabric tightly, and use 304 or 316 stainless steel fittings. Avoid weak anchor points, maintain tension regularly, and choose UV-certified fabric. Follow these steps, and discover further critical details for secure, durable shade sail installation.
Key Takeaways
- Measuring the outdoor area inaccurately leads to incorrect sail sizing and poor fitting.
- Installing shade sails without the proper 20-30 degree angle prevents effective rainwater runoff.
- Using weak posts or shallow post installations compromises the shade sail’s stability and safety.
- Attaching sails to inadequate or flimsy anchor points increases risk of structural failure.
- Neglecting regular maintenance causes hardware corrosion and fabric sagging, reducing sail lifespan.
Measuring the Outdoor Area Incorrectly
You may be interested
Begin by accurately measuring the outdoor area using a steel tape measure, noting length, width, and height from fixed anchor points. Avoid incorrect measurements to prevent shade sail installation errors that compromise coverage. Measure multiple points to accommodate irregular surfaces, ensuring the chosen shape for your space fits precisely. Confirm the selected sail shape—triangular or rectangular—matches these dimensions to maintain efficient functionality. Record all data systematically to avoid underestimating or overestimating size requirements. Incorrect sizing may cause sagging, tensioning difficulties, or fabric tearing during installation. Use a level or laser measure to verify height consistency at attachment points. Double-check results before ordering the sail. Accurate measurements enable proper tension, ideal coverage, and a clean appearance, delivering effective, durable shade tailored to the specific outdoor layout. Additionally, leaving a margin of 0.5-2 feet for hardware is essential to allow proper fitting and tensioning during installation.
Investing in a Shade Sail That Is Too Small
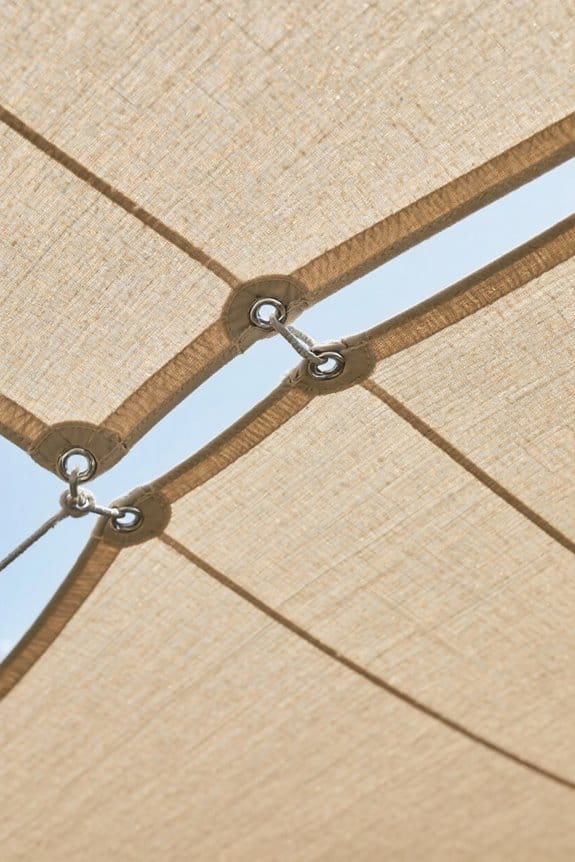
Several critical factors must be considered to avoid investing in a shade sail that is too small. Begin by accurately measuring the outdoor space, including the distance between fittings and posts, to guarantee ample coverage. Select shade sails made to fit both the size and shape requirements, prioritizing functionality over mere aesthetics. Account for the additional space needed for fittings and tensioning hardware to prevent sagging or instability. Confirm the sail size adequately shields the designated area from sunlight, guaranteeing effective shade and protection. Proper installation demands precise measurements and material choice to avoid common mistakes such as gaps or insufficient coverage. Following these guidelines helps achieve a secure, efficient shading solution that meets practical needs without compromises. Additionally, choosing hardware made of 304 or 316 stainless steel ensures the longevity and durability of your installation.
Recommended Products
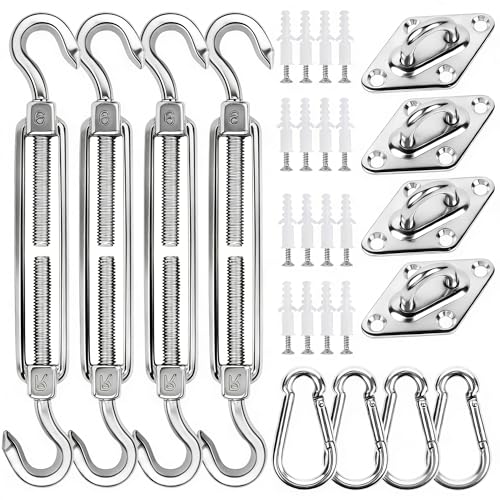
All-in-One Sun Shade Sail Hardware Kit: Our complete shade sail hardware kit includes everything you need for easy installation: 4 turnbuckles, 4 snap hooks, 4 pad eyes, 16 screws, and 16 expansion anchors. Ideal for sun shades outdoor patio, pergolas, awnings for patio, and outdoor sails for shade waterproof.

All-in-One Sun Shade Sail Hardware Kit: Our complete sunshade hanging kit includes everything you need for easy installation: 4 turnbuckles, 4 snap hooks, 4 pad eyes, 16 screws, and 16 expansion anchors. Ideal for sun shades outdoor patio, pergolas, awnings for patio, and outdoor sails for shade waterproof.

🛠️【60 Pcs Sun Shade Hardware Kit】Including 2 x Wall Mount, 2 x Ratchet Winches, 6 x Snap Hook, 2 x Pad Eyes, 4 x Double Rope Clamps, 20 x Screw, 20 x Plastic Expansion Bolts, and 4 x 6.6ft Wire Ropes.
Installing the Shade Sail Without Proper Angle
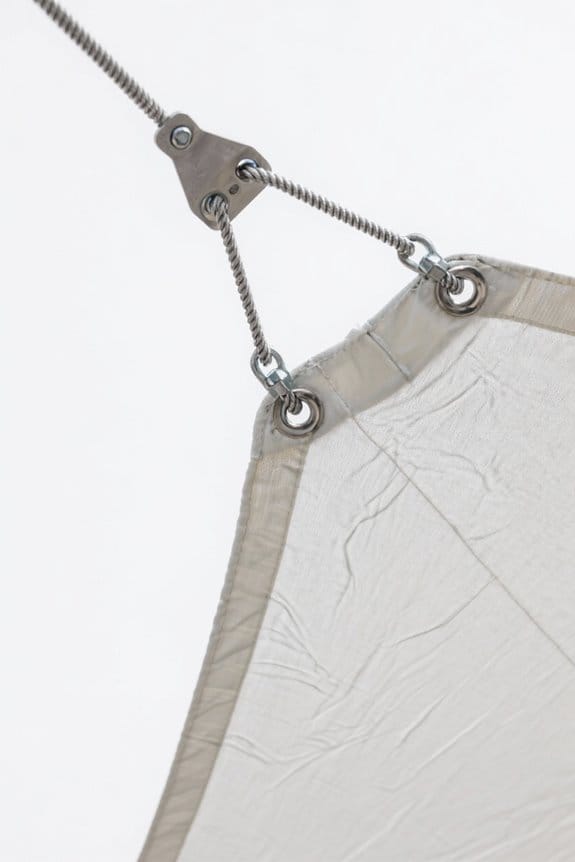
When installing a shade sail, guarantee it is mounted with a proper angle between 20 to 30 degrees to facilitate effective rainwater runoff. Avoid shade sail mistakes such as flat installations that cause water pooling, leading to fabric strain, premature wear, or damage. Identify one corner as the designated runoff point and secure it lower than the others to promote water drainage away from the sail. Stretch the fabric tightly to reduce seam water ingress, which undermines durability. Neglecting the proper angle reduces shade coverage during peak sunlight, compromising UV protection. Monitor tension regularly and adjust the sail if sagging occurs. Use a digital level or inclinometer to confirm angles precisely. Follow these steps meticulously to guarantee longevity, effective rainwater management, and ideal protection from harmful UV rays. Additionally, using turnbuckles with a high load capacity ensures the sail maintains proper tension and structural integrity under varying weather conditions.
Using Weak or Inappropriate Attaching Points
Although the appeal of quick fixes may tempt one to use weak anchors, always select sturdy attaching points capable of resisting significant tension and environmental forces. Avoid weak attaching points such as flimsy anchors or inadequately treated wood. Choose buried posts made of durable materials like galvanized steel or properly treated timber, driven at least 600mm deep for stability. Conduct a proper assessment to confirm that posts and fixings can bear dynamic loads caused by wind and sail strain. Use weatherproof fixings, preferably stainless steel turnbuckles and pad eyes, matched to the sail’s weight and local weather conditions. Inspect all connections regularly for corrosion or looseness, and replace any compromised components promptly. Neglecting this step risks sail failure, structural damage, and personal injury. Secure and reliable attachment guarantees peak performance and longevity of the shade sail. Additionally, ensure the use of stainless steel D-rings for secure installation and to enhance durability.
Recommended Products

Sun Shade Hardware Kit Heavy Duty- This 6" rectangle outdoor shade sail installation kit is made of high quality 304 grade stainless steel. with maximum corrosion resistance and durability, The sun shade hardware kit triangle is extremely strong and resistant to the elements, High load-carrying capacity to keep your sails stable in wind, suitable for windy areas or large fixtures such as sun shade sail, canopy.

Heavy Duty & Premium 304 Stainless Steel: Our shade sail hardware kit is crafted from high-quality 304 marine-grade stainless steel, delivering exceptional strength, durability, and corrosion resistance. Every component—from turnbuckles to wire ropes—is built to withstand harsh outdoor conditions, ensuring long-lasting, rustproof performance. The sleek silver finish is neutral and versatile, blending seamlessly with any patio, garden, or outdoor decor.

Ultimate All-Weather Durability: Experience unmatched reliability with BUDONI's Shade Sail Hardware Kit, designed exclusively for outdoor use in every season. Crafted from premium 304 stainless steel, resistant to rust and corrosion. It's engineered to endure high winds and harsh conditions, making it a steadfast companion for your patio deck shade sail. Enjoy the safety and durability of BUDONI's Shade Sail Hardware Kit, ideal for any outdoor area and a top choice for reliable shade solutions.
Purchasing a Shade Sail Without UV Protection
Since purchasing a shade sail lacking UV protection compromises occupant safety, prioritize selecting fabrics certified for ultraviolet blocking. Check for certification labels from reputable organizations to verify genuine UV protection, ensuring harmful rays are effectively blocked. Avoid low-cost shade sails that may fade and degrade within a few years, as these often lack adequate UV resistance. Consider darker fabrics, typically offering better UV defense despite color assumptions. Confirm product longevity, aiming for sails rated to last at least 5 to 15 years under sun exposure. Remember, purchasing a non-UV protective shade exposes users to serious health risks like skin cancer. Always request specification sheets detailing UV protection levels, compare product guarantees, and choose established manufacturers to secure reliable shade and long-term safety. Additionally, selecting shade sails made from high-density polyethylene fabric can ensure up to 95% UV ray blockage for effective sun protection.
Recommended Products

【UV Protection & Cooling】Made of 100% brand new High Density Polyethylene material and eliminate the use of splicing fabrics.Blocks up to 95% of harmful UV rays and direct sunlight exposure."Breathable" fabric allows air to pass freely and achieve a certain degree of cooling.

☂ 【UV PROTECTION & BREATHABLE】The shade sail is made of High Density Polyethylene fabric, which provides excellent shade to protect you from the sun.It can effectively block harmful UV rays from the sun, preventing your skin from being damaged by the sun. Permeable fabric allows air to pass freely so you can stay cool.

【UV Protection & Cooling】Made of 100% brand new High Density Polyethylene material and eliminate the use of splicing fabrics.Blocks up to 95% of harmful UV rays and direct sunlight exposure."Breathable" fabric allows air to pass freely and achieve a certain degree of cooling.
Attempting to Cover a Large Area With a Single Sail
Avoid covering an extensive area with a single shade sail, as this approach often causes uneven tension and sagging. Use multiple smaller sails, spaced and angled appropriately, to guarantee uniform shade and reduce wind pressure. Install sturdy stainless steel turnbuckles and tensioners on each corner, check tension regularly, and adjust to prevent fabric distortion. Large single sails trap water in the center, increasing risk of tears; design overlapping sails with slight slopes to facilitate water runoff effectively. Remember, sails are a great modular solution—layering them allows customization for changing sun angles and seasonal needs. Measure the area precisely, plan attachment points strategically, and use marine-grade stainless steel fittings for durability. This method enhances both function and appearance, optimizing shade and prolonging sail lifespan. Additionally, selecting materials with high resistance to UV rays and abrasion improves longevity and reduces maintenance for outdoor installations like shade sails, similar to choosing the right hose materials in pool maintenance.
Incorrect Positioning of Support Posts
Proper positioning of support posts is critical for maintaining consistent tension and stability in shade sail installations. Avoid incorrect positioning by installing posts at designated anchor points aligned with the sail’s shape and size, ensuring proper coverage. Bury each post at least one third of its length into the ground to achieve peak stability, using concrete footings for added support if necessary. Check post alignment carefully to prevent uneven tension, which may cause sagging, flapping, or premature wear under wind stress. Use a level and measuring tape to verify vertical and lateral placement before securing. Seek professional installation advice during the planning phase to identify correct locations and address site-specific challenges. Proper post positioning enhances durability and maintains the sail’s functional and aesthetic integrity. Additionally, using galvanized poles with appropriate wall thickness ensures strength and longevity of the installation.
Choosing the Wrong Type of Posts
Three critical factors influence shade sail stability: post material, size, and installation depth. Posts are usually made from steel, treated wood, or heavy-duty aluminum; select materials that resist bending and corrosion. Avoid lightweight or decorative posts, as these compromise strength and risk collapse under wind tension. For common shade sail setups, use posts with a minimum diameter of 90mm and wall thickness suitable for structural loads. Inspect posts regularly for rot or rust when providing shade. Poor installation often results from choosing inadequate posts that fail to support tension, causing premature failure. Prioritize posts designed specifically for load-bearing, not garden aesthetics. Follow manufacturer guidelines for post specifications to guarantee durability. Verify all posts meet load capacity requirements before securing shade sails to maintain a stable, safe outdoor shelter. Always use appropriate protective equipment when handling materials to ensure safety during installation.
Recommended Products

Shade Sail Pole Introduction:12-foot adjustable height: Each sunshade pole is composed of 4 modular parts, allowing you to adjust the final height to a maximum of 12 feet. Additionally, the top of our poles is equipped with three fixed points, facilitating your free suspension of the sunshade pole, adding practicality and personalization to your outdoor space while ensuring the stability and reliability of the sunshade pole's support.

【Spiral Grounding Structure】Our shade sail poles boasts an innovative spiral grounding design, ensuring deeper stability. In addition, the newly upgraded stainless steel avoids bending. We recommend embedding the Miveda sun sail poles in the ground at 34 inches.

Heavy Duty Shade Sail Pole — 2.2mm thickened steel wall with 3-inch diameter, reinforced screw joints, and a 4-plate base support. Adjustable height 6.6ft/10ft – ideal for patio shade, string lights, garden decor, and outdoor weddings
Installing Posts at an Inadequate Depth
After selecting posts with adequate strength and materials, focus on installing them at the correct depth to secure shade sail stability. Bury posts at least one-third of their length underground, typically a minimum of 25 inches for freestanding installations. Excavate holes deep and wide enough to accommodate concrete reinforcement around the post base, increasing overall stability and preventing displacement during high winds. Position posts vertically, ensuring alignment before pouring concrete to lock them firmly in place. Avoid superficial depth installations, as inadequate burial compromises stability and risks tipping or collapse. Proper depth also reduces pressure on hardware and fabric tension points. Use metal or treated wooden posts resistant to rot or rust when buried. Follow manufacturer specifications and local building codes closely. Taking these steps guarantees a safer, longer-lasting shade sail installation. Additionally, incorporating a weighted base similar to those used in patio heaters can further enhance post stability.
Neglecting Regular Maintenance of Posts and Hardware
While initial installation guarantees stability, neglecting regular maintenance of posts and hardware can rapidly compromise shade sail safety and function. Inspect wooden posts monthly for signs of rotting; replace any found compromised to avoid collapse. Examine metal posts for rust, sanding and treating spots promptly to preserve strength. Clean hardware quarterly, removing dirt and debris that may accelerate corrosion. Tighten all fittings regularly, using a torque wrench to achieve manufacturer-specified tension values, ensuring ideal sail tautness. Recheck overall tension seasonally, adjusting to environmental stressors like wind or rain. Replace any corroded or weakened components immediately. Maintain clear drainage around the base of posts to prevent moisture accumulation, which accelerates deterioration. Performing these routine maintenance tasks preserves the stability and longevity of the shade sail installation, preventing costly repairs and potential safety hazards from hardware failure. Proper handling and storage of metal components is important to avoid corrosion and skin irritation as noted in maintenance best practices.
DIY Installation Without Proper Tools or Skills
Confirm access to all required tools before beginning the DIY shade sail installation, including power drills with masonry bits or wood augers, adjustable wrenches, tensioning devices like turnbuckles or ratchets, and sturdy ladders rated for outdoor use. Avoid common mistakes by ensuring accurate measurements and proper mounting angles to maintain structural integrity. Develop the necessary skills to properly tension the sail; inadequate tension leads to sagging and instability. Inspect attachment points carefully, selecting robust anchors capable of handling wind loads. Inexperience may cause safety hazards and premature wear. If unfamiliar with these tasks, reconsider DIY installation to prevent costly errors and structural failure. When in doubt, consult professionals to guarantee the shade sail’s longevity and effective coverage while minimizing safety risks inherent to improper installation techniques.
Recommended Products
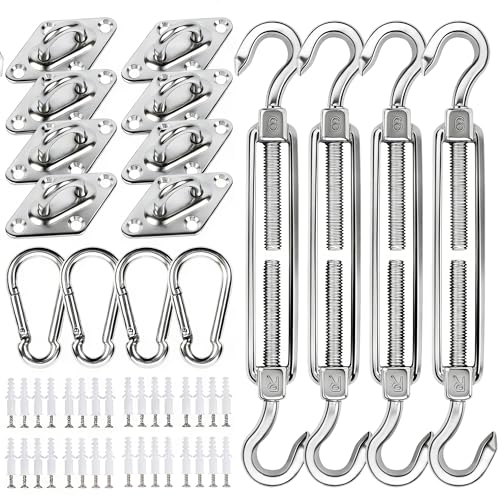
[One Kit for Any Design]: Conquer any shade sail project—rectangle, triangle, hexagon, or custom shapes—with one comprehensive 80-piece kit. Ditch the confusion of piecing together multiple sets. Plus, when installing common square or triangle sails, the extra hardware acts as your instant backup plan, saving you time and hassle if a replacement is ever needed.
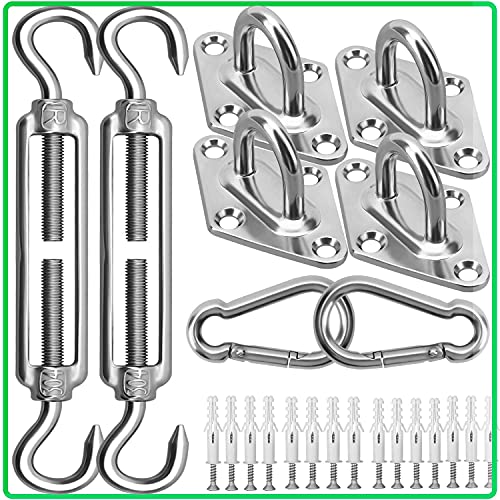
High Quality Shade Hardware Kit - This 6" rectangle outdoor shade sail installation kit is made of high quality 304 grade stainless steel. The hardware kit is extremely strong and resistant to the elements, This is can to support 141s of pounds. High load-carrying capacity to keep your sails stable in wind, suitable for windy areas or large fixtures such as sun shade sail, canopy

Premium Craftsmanship Durable: BUDONI shade sail hardware kit is crafted from premium 304 stainless steel with an anti-rust black oxide finish, providing excellent corrosion resistance and long-lasting durability for extended outdoor use. This sun shade hardware kit withstands rain, UV solar exposure, and strong wind, making it an ideal choice for securing shade sail. This shade sail hardware delivers reliable performance while adding a modern, high-end look to sun shades outdoor patio setups.
Frequently Asked Questions
Why Do Shade Sail Posts Need to Be Angled?
Shade sail posts need angling for effective post installation techniques, ensuring ideal post height and proper sail tensioning methods. This facilitates water runoff, reduces fabric stress, and complements material selection tips for enhanced durability and stability.
Why Does My Shade Sail Sag in the Middle?
Like a hammock losing its embrace, a shade sail sags due to improper shade sail installation, common installation errors, or neglecting tension adjustment techniques. Applying appropriate tensioning methods prevents middle sagging for a taut, durable cover.
What Is the Disadvantage of a Shade Sail?
A disadvantage of a shade sail lies in improper installation techniques and low-quality shade sail materials, leading to sagging or collapse. Weather considerations and inadequate maintenance tips further impact durability and effectiveness, reducing overall protection and lifespan.
How Much Tension Should a Shade Sail Have?
A shade sail should have tension sufficient to maintain a taut surface, typically adjusted between 20 to 30 degrees for drainage. Proper installation, fabric selection, tension adjustments, and weather considerations guarantee durability and effective performance.