As an Amazon Associate, we earn from qualifying purchases. Some links on this site are affiliate links at no extra cost to you. Our recommendations are based on thorough research and editorial judgment.
Pool Vacuum Troubleshooting: Common Issues Solved
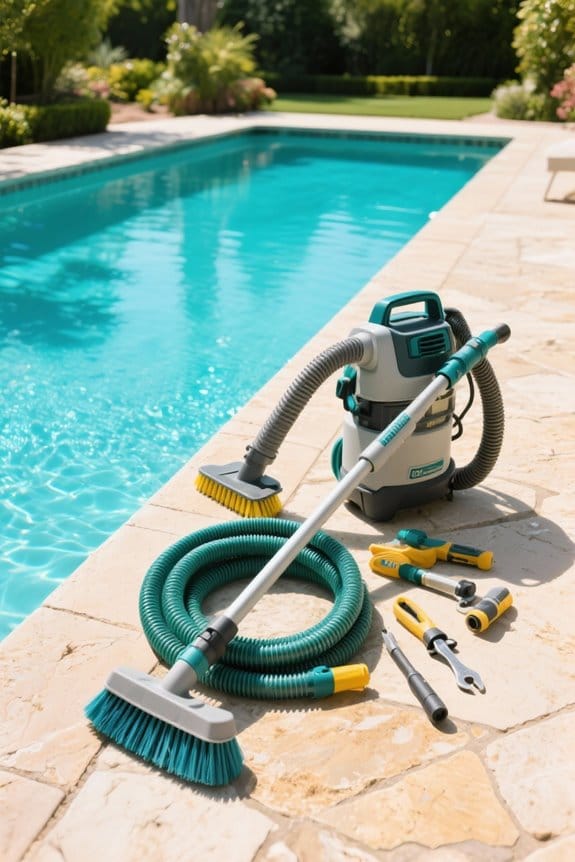
Inspect the pool vacuum intake for clogs like leaves or twigs; remove debris using tweezers or flush with a hose. Detach and clean cartridge or bag filters thoroughly to maintain suction. Submerge the vacuum hose underwater to purge trapped air, then check for cuts causing leaks. Tighten hose connections and seal small leaks with waterproof tape. Use shaving foam around joints to find hidden air leaks, marking trouble spots for repair. Staying methodical guarantees consistent cleaning power and efficiency, with further detailed steps ahead.
Key Takeaways
- Check and clear debris clogs from the vacuum intake hole to maintain suction efficiency.
- Regularly clean and inspect vacuum filters to prevent blockages and extend vacuum life.
- Submerge and drain the vacuum hose to remove trapped air and ensure steady water flow.
- Inspect hose connections and pump components for air leaks, tightening or sealing any gaps.
- Use shaving foam around hose joints to identify and fix escaping air leaks effectively.
Check for Clogs in Your Pool Vacuum System
You may be interested

Before operating the pool vacuum, inspect the intake hole carefully for common blockages such as leaves, twigs, or small objects. Regularly check for clogs by examining this area closely to prevent suction loss. Remove visible debris manually using tweezers or small hooks to avoid damage. Flush the intake hole with a garden hose to clear blockages further and guarantee water flows freely through the system. If clogs persist, disassemble the pool vacuum as per manufacturer instructions to access internal components and clear stubborn debris. Maintaining a clean intake hole is essential for peak performance, as blockages reduce suction power and efficiency. Addressing these common issues promptly helps maintain smooth operation and extends the vacuum’s lifespan. Follow these steps to keep your pool vacuum functioning effectively. Additionally, it is important to inspect hoses for cracks regularly, as damaged hoses can cause leaks that diminish suction power and cleaning efficiency.
Recommended Products

1-1/2" diameter connections are compatible with most automatic pool vacuum cleaners. Including but not limited to Kreepy Krauly, Baracuda G3/G4, Kreepy Kruiser, Great White, Kreepy Classic, Hayward Navigator, Pool Vac Ultra, Aqua Bug, Polaris ATV

Automatic cleaner hose with mould cuffs - Dia.1-1/2 X 1m

Automatic Cleaner Hose with Mould Cuffs: Features a diameter of 1-1/2 inches with each section measuring 1 meter in length for reliable pool cleaning performance
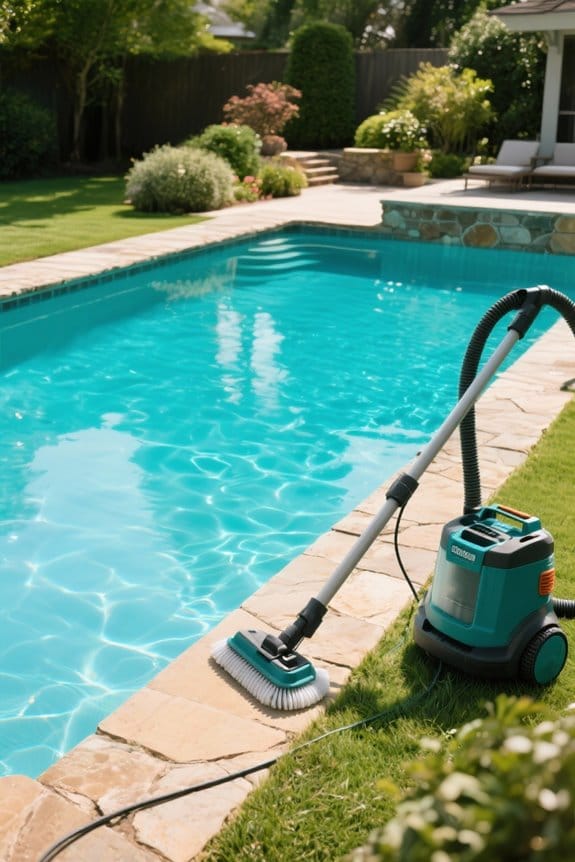
Inspect and Clean Your Pool Vacuum Filters
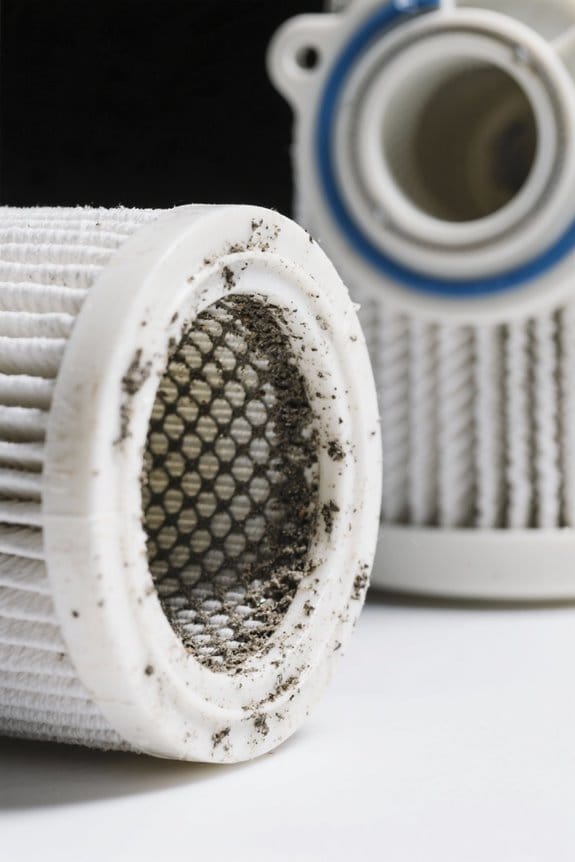
Once the intake hole is clear, focus on inspecting the pool vacuum filters, as clogged filters can greatly impair suction and cleaning capacity. Detach the filters regularly and examine them for debris buildup or damage. Cartridge filters require rinsing with a garden hose, soaking in soapy water for deeper cleaning, then rinsing again. For bag filters, empty accumulated debris and check for tears to guarantee peak performance. Select the appropriate filter type—cartridge, bag, or fine mesh—based on your pool’s debris characteristics. Consistent maintenance of clean filters improves vacuum efficiency, restores suction strength, and reduces motor strain. Prioritize this task during troubleshooting to uphold your pool vacuum’s overall performance and extend its operational life. Additionally, monitoring filter performance regularly ensures efficient circulation and optimal pump functioning.
Recommended Products

Pool Cleaner Filters Model Number : RCX70101, RCX70101PAK2;

【Perfect Fit】This x-treme filter bag is perfectly compatible with Pool Blaster Max, Max CG, Catfish Ultra, iVac 250, iVAC C2 and compatible with Water Tech Volt FX-4 Pool Vacuum

Compatible with Pool Blaster Max Li 30000ML, Catfish Ultra 21001DL/21051DL, iVac 250 25000GL/25050GL, iVAC C2 IVCF702, Volt FX-4 24000GL/24050GL and JPV200 (25150GL)
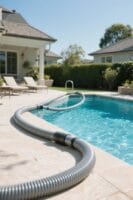
Identify and Remove Air From the Vacuum Hose
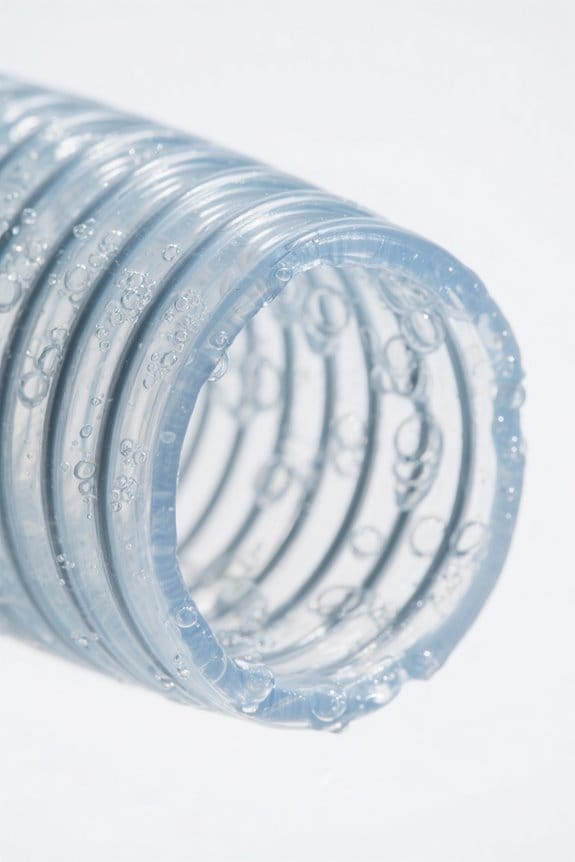
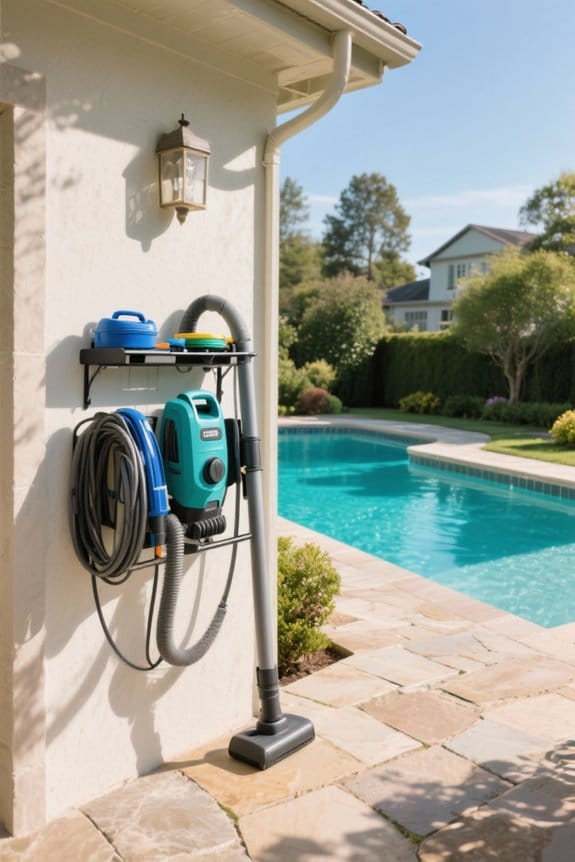
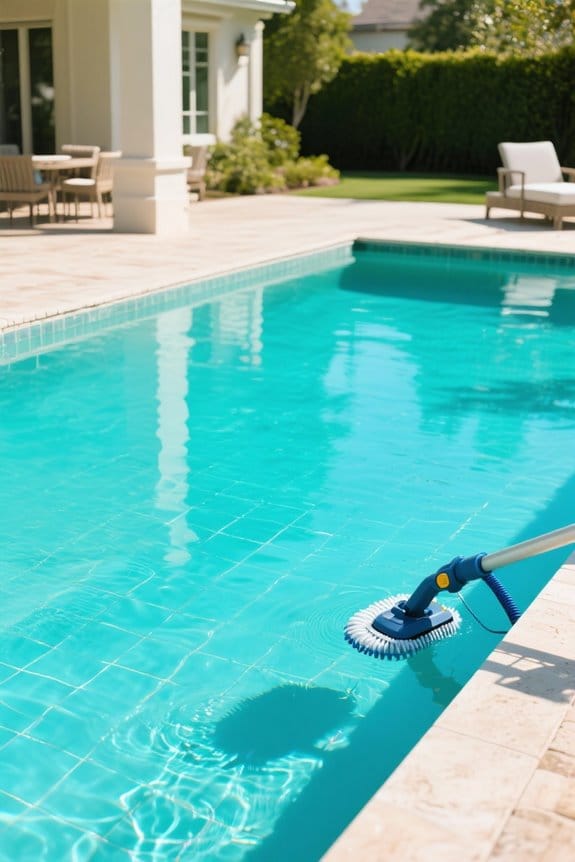
Submerge the entire vacuum hose fully underwater before use to purge trapped air, guaranteeing superior suction performance. Drain the hose completely after disconnecting it from the vacuum to eliminate residual air pockets. Connect the vacuum hose directly to the pump when possible, as this helps maintain steady water flow and reduces air buildup. Regularly inspect the hose for blockages or minor tears that can cause air leaks, a common problem affecting suction and pump efficiency. Remove any debris caught in the skimmer or pool filter to prevent interruptions in water flow, which contribute to pump issues. Adhere to regular maintenance schedules, checking the vacuum hose and attachments to verify your pool stays clean and free from interruptions caused by trapped air or reduced suction. Proper hose storage practices, such as coiling hoses neatly and storing them in cool, dry locations, can significantly extend the hose’s lifespan and prevent air leaks.
Recommended Products

Flexible Length: Includes eight 40 inch sections; connects up to 26 feet total for different pool sizes

The 1.5-inch diameter connector is compatible with most automatic pool cleaner hoses, including: Kreepy Krauly, Hayward Navigator, Baracuda G3/G4, Kreepy Kruiser, Kreepy Classic, Pool Vac Ultra, Aqua Bug, and more. It provides seamless integration, effortlessly fitting into your existing cleaning system.
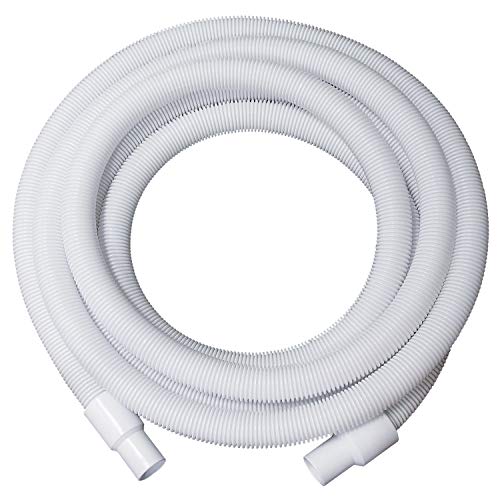
Heavy duty pool leaf vacuum hose features leak-proof seal on cuff to prevent air from entering or exiting the hose, ensuring maximum vacuum suction while staying afloat
Detecting and Fixing Air Leaks in the Vacuum Line
Many pool owners encounter air leaks that drastically reduce vacuum suction, identifiable by persistent air bubbles or noisy pump operation. When the pool vacuum stops working effectively, immediately inspect the cleaner’s pump basket and gasket for cracks or looseness. Examine all connections between hoses for gaps or damage, tightening fittings as necessary. Listen for unusual noises from the vacuum system that signal air intrusion. Submerge the entire vacuum hose during operation to minimize trapped air, preventing reducing suction. For small leaks, apply waterproof tape around hose joints and pump basket cover, ensuring a tight seal without blocking water flow. Replace faulty parts promptly if tape does not suffice. Consistently monitoring and maintaining these areas preserves suction power and prevents common air leaks that impair vacuum performance. Using hoses made from UV- and chemical-resistant EVA material can also help prevent issues related to hose wear and tear that may cause air leaks.
Recommended Products

2 Replacement cuffs that fit onto 1-1/2" spiral-wound pool vacuum hoses. Replace and repair cracked hose ends.

THE FIX-IT-ALL TAPE: Most versatile tape for quick repairs; clear color for discreet repairs; add to repair kit for home, marine, sporting and pool patching applications; repair recreational equipment such as pools, pool covers, boat covers, inflatables, tents, canopies and more
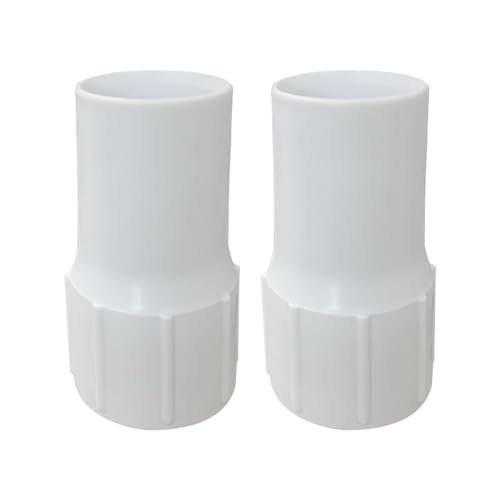
2Pack 1-1/2" Pool Hose Cuff,Spiral Wound Vacuum Hose Replacement Cuff for Repair Connect Vacuum Head
quality material: Our 1-1/2” POOL HOSE CUFF made of high-quality plastic, safe, durable and reliable,can you for a long time Use
Using the Shaving Foam Test to Locate Air Leaks
Apply a thin layer of shaving foam around vacuum hose connections, pump baskets, and gasket areas to initiate the air leak detection process. Use the shaving foam test to detect leaks in the pool vacuum system, as escaping air creates visible bubbles or dimples in the foam. Conduct a thorough inspection, focusing on common sites of air intrusion. Avoid thick foam layers, which may obscure subtle leak signs. Once identified, mark leak locations clearly and proceed with targeted repairs, such as replacing damaged parts or tightening connections. This method is especially effective when sound-based detection fails. Properly addressing air leaks guarantees the vacuum system maintains peak performance, preventing efficiency loss caused by unwanted air intrusion. Repeat the test after repairs to confirm all leaks have been resolved before resuming pool vacuum operation. For prolonged system durability, consider regular inspections similar to those recommended for UV-stabilized materials to prevent premature wear.
Tips for Maintaining Optimal Pool Vacuum Performance
To maintain ideal pool vacuum performance, begin by regularly inspecting and cleaning cartridge or sand filters to prevent suction loss caused by clogging. Check hoses weekly for debris or blockages, and verify all connections are tight to avoid leaks that reduce vacuum suction. Clean vacuum heads after each use, removing trapped dirt and grime that impair efficiency. Lubricate moving parts to guarantee smooth operation, and replace worn brushes or seals promptly to maintain consistent performance. Properly coil hoses to prevent kinks during storage, and rinse all equipment thoroughly to remove chemical buildup. Follow these maintenance steps to keep the pool vacuum operating at peak suction power, avoid costly repairs, and guarantee effective debris removal throughout the swimming season. Additionally, consider the brush design influence on coverage and cleaning effectiveness to ensure thorough debris removal, especially in corners and steps.
Recommended Products

Fit most pool leaf vacuum / eater / gulper including Poolmaster, Pentair, and other aftermartet brand

【SPX1068G3 Pool Vacuum Brush Head】Replacement Hay-ward any broken brushes or missing bristles in your pool vacuum head. Fit most pool leaf vacuum / eater / gulper including Poolmaster, Pentair, and Etc.
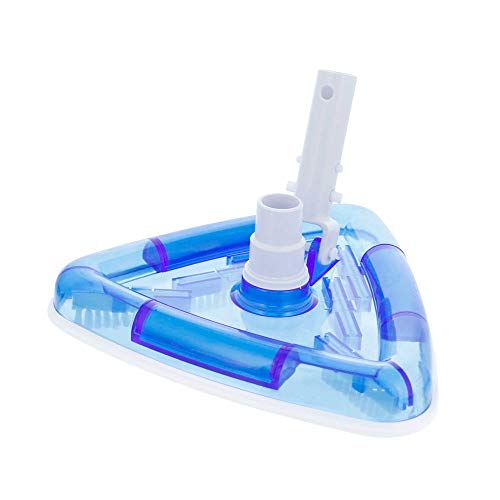
Swivel head connection accepts 1-1/4" and 1-1/2" hose
Frequently Asked Questions
Why Is My Pool Vacuum Not Working Properly?
Like a car sputtering without fuel, a pool vacuum’s malfunction often stems from vacuum suction issues due to hose leaks, filter clogs, debris blockages, or programming errors. Power supply checks, water flow, vacuum settings, maintenance routines, and troubleshooting guides aid resolution.
Why Is My Pool Vacuum Staying in One Spot?
The pool vacuum movement may be hindered by hose tangling solutions not applied, suction power issues, or debris blockage solutions ignored. Troubleshooting tips include filter maintenance advice, following a cleaning schedule, adjusting vacuum settings, and recognizing vacuum replacement signs.
How Do I Get My Vacuum to Start Spinning Again?
To get the vacuum to start spinning again, one should test impeller functionality, check for vacuum motor issues, address hose connection problems, perform a filter cleanliness check, restore suction power, clear cleaning head blockage, reset automated settings, verify system power supply, and adjust programming.
What Is the Life Expectancy of a Pool Vacuum?
The life expectancy of pool vacuums varies from 3 to 10 years, influenced by vacuum lifespan factors like pool vacuum maintenance, vacuum filter cleaning, seasonal vacuum storage, and quality pool vacuum brands, whether manual, automatic, or robotic models.